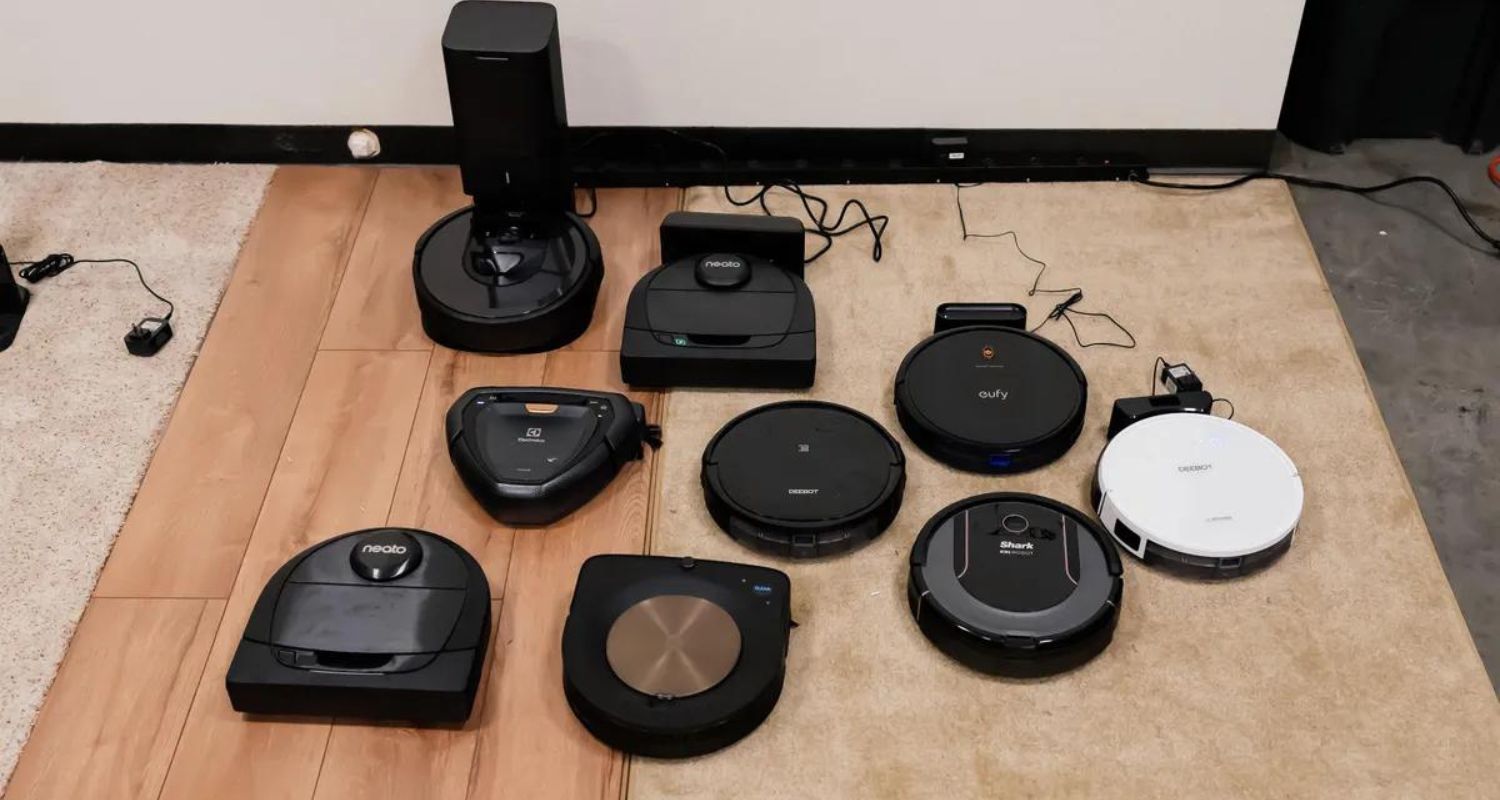
Have you recently upgraded your home wireless network or routers and are wondering how to connect your Roomba vacuum to the new WiFi? Updating your robot’s settings is easy if you know the right steps. Here is a quick guide to how to change Roomba WiFi.
Connecting your Roomba to a new WiFi network is simple: fully charge it, have your network’s name and password ready, power on the Roomba to connect via the iRobot Home App, ensure it’s near the router for a strong signal, and give your robot a fun name in the app for remote control. Patience during setup ensures smooth, autonomous vacuuming going forward.
WiFi is key for your little Roomba pal to do its job right. It must connect online to get navigation maps, set clean schedules, and send updates on its adventures. Changing up its WiFi can freshen that connection. All you have to do is find the WiFi button, select your network, enter the password like on your phone, and connect. Easy peasy! Now, let’s get started with how to change Roomba WiFi. Also, don’t forget to check out our guide if you have problems logging into your Nexxt Router!
See Also: Motorola Modem Login I A Complete Guide For You
Understanding the Importance of Changing Your Roomba’s WiFi Settings
Most of us don’t give it much thought, but WiFi is key for your little Roomba pal to do its job right. It needs to be online to access mapping data, set and adjust its cleaning schedule, and send you reports on how it’s tackling dirt and fuzzies in your home each day.
Like our phones and laptops, over time, a Roomba’s WiFi connection can also start to go a bit wonky. That’s where changing up its WiFi settings comes in.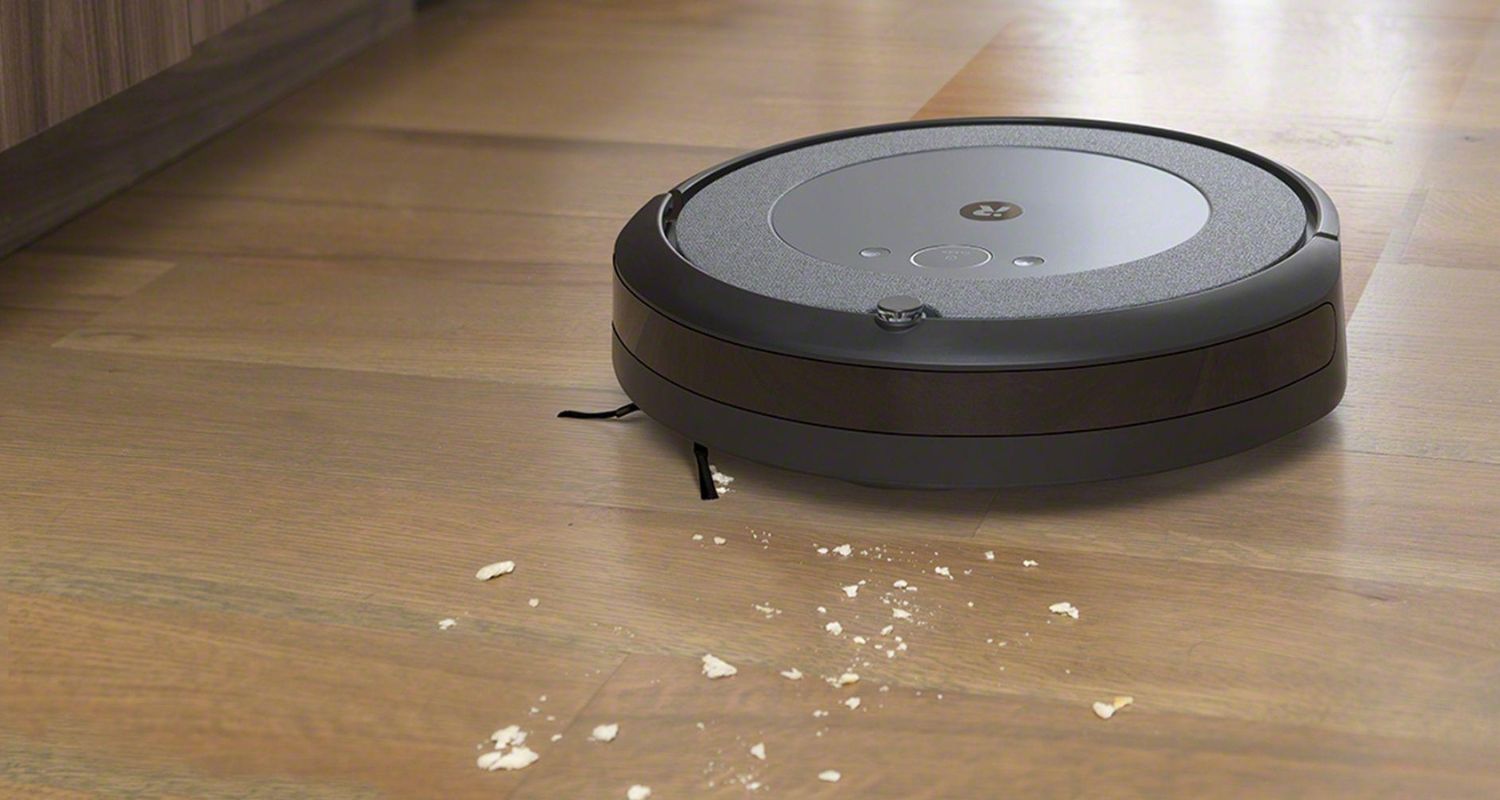
A faulty WiFi connection means your little robot buddy won’t be operating at maximum efficiency. The mapping may get glitchy, or the scheduled cleanings might trigger differently.
The good news is changing a Roomba’s WiFi is a breeze like is with any other smart home device like Changing Wi-Fi On Aiwit Doorbell. All it takes is pressing the little WiFi button, selecting your network from the list, and punching in that password. Most models walk you through it step by step using their built-in voice prompts.
You don’t need to be a tech whiz or have an IT degree. Even if you’re not the best with gadgets, I promise you can have your Roomba hooked back up and vacuuming away in just a few minutes.
Keeping your Roomba synced to a stable, strong WiFi connection is important for all the neat, smart features we love our bot pals for. Don’t be afraid to change things up occasionally to keep that bond optimized.
Your robot friend will work more efficiently, and you’ll get the most out of all the cool updates and functionality. Like a phone needs updated software, your Roomba also depends on you to manage its WiFi! Let us see how to change Roomba WiFi.
See Also: How To Troubleshoot Netgear Router Not Working
Accessing Roomba’s WiFi Settings on the App
Pulling up your Roomba’s WiFi settings on the app is super simple, whether you’re an iOS or Android user.
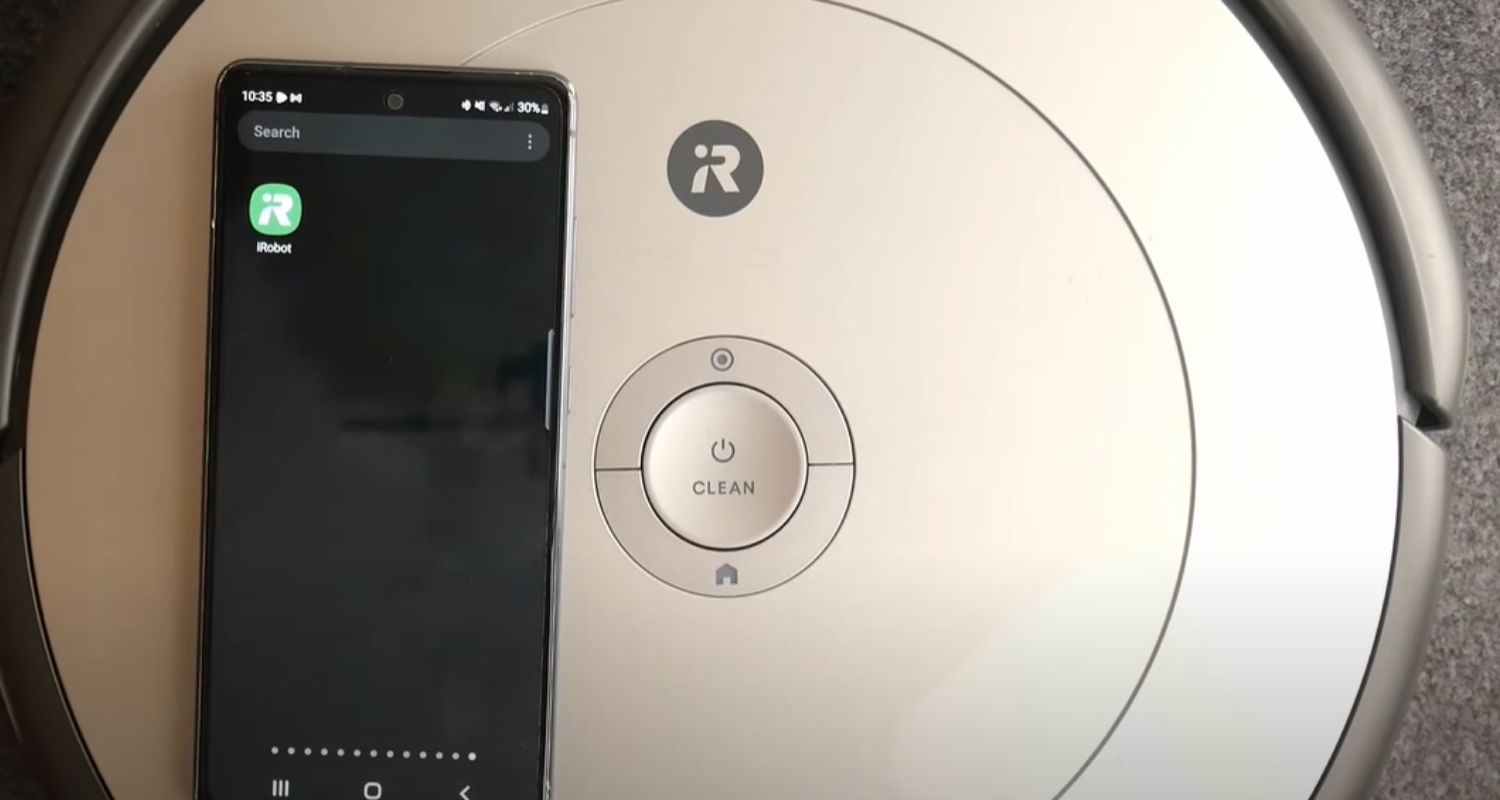
- The first thing to do when on how to set up a Roomba is make sure you’ve downloaded the iRobot HOME app from your device’s app store. This is how you’ll remotely control your bot buddy.
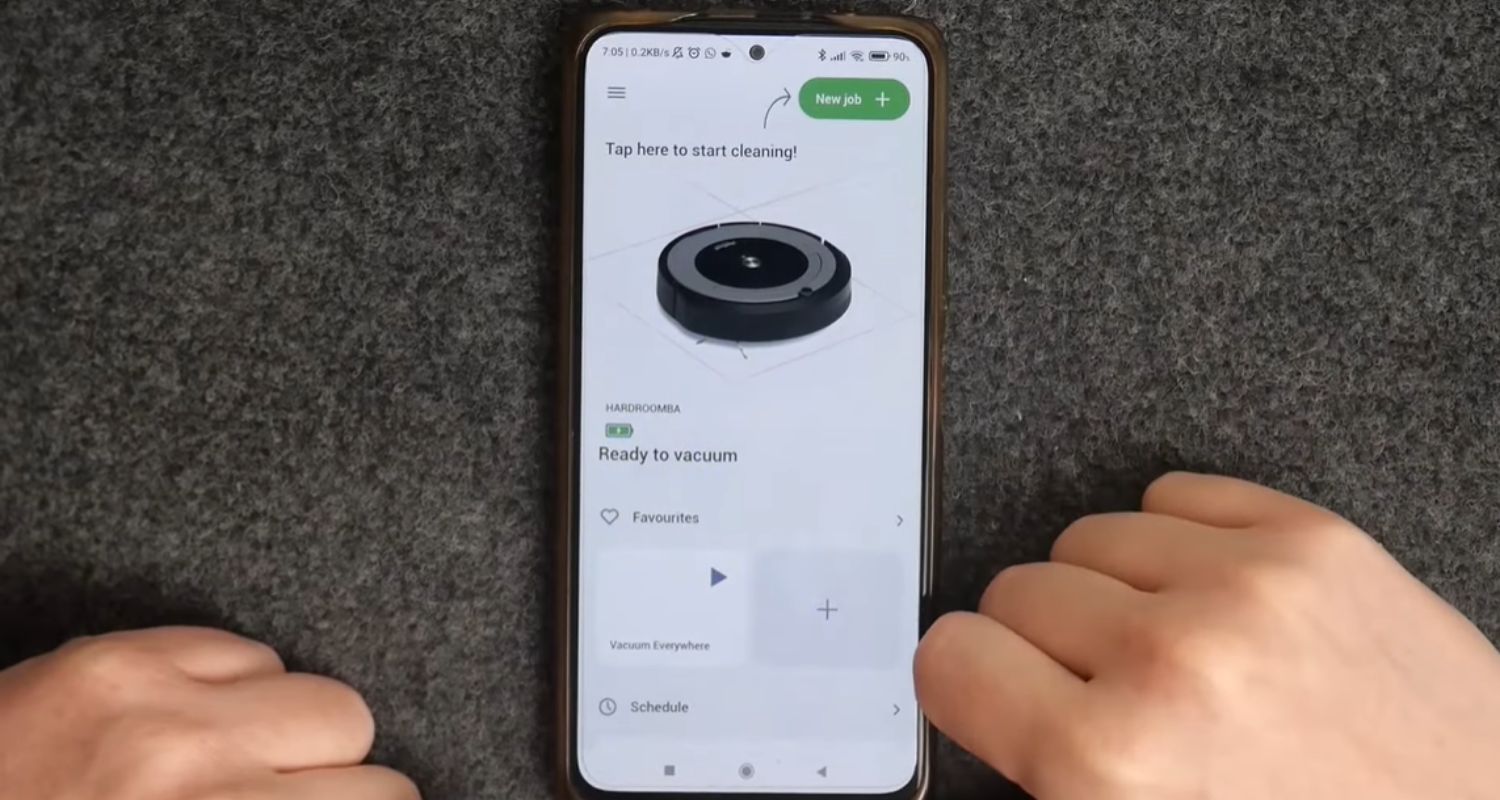
- Once installed, open the app and log in to your account. The icons across the bottom will show all the connected robots in your home. Tap on the one you want to mess with the WiFi for. Then look along the left menu – you’ll see an icon shaped like a little gear. Tap that bad boy.
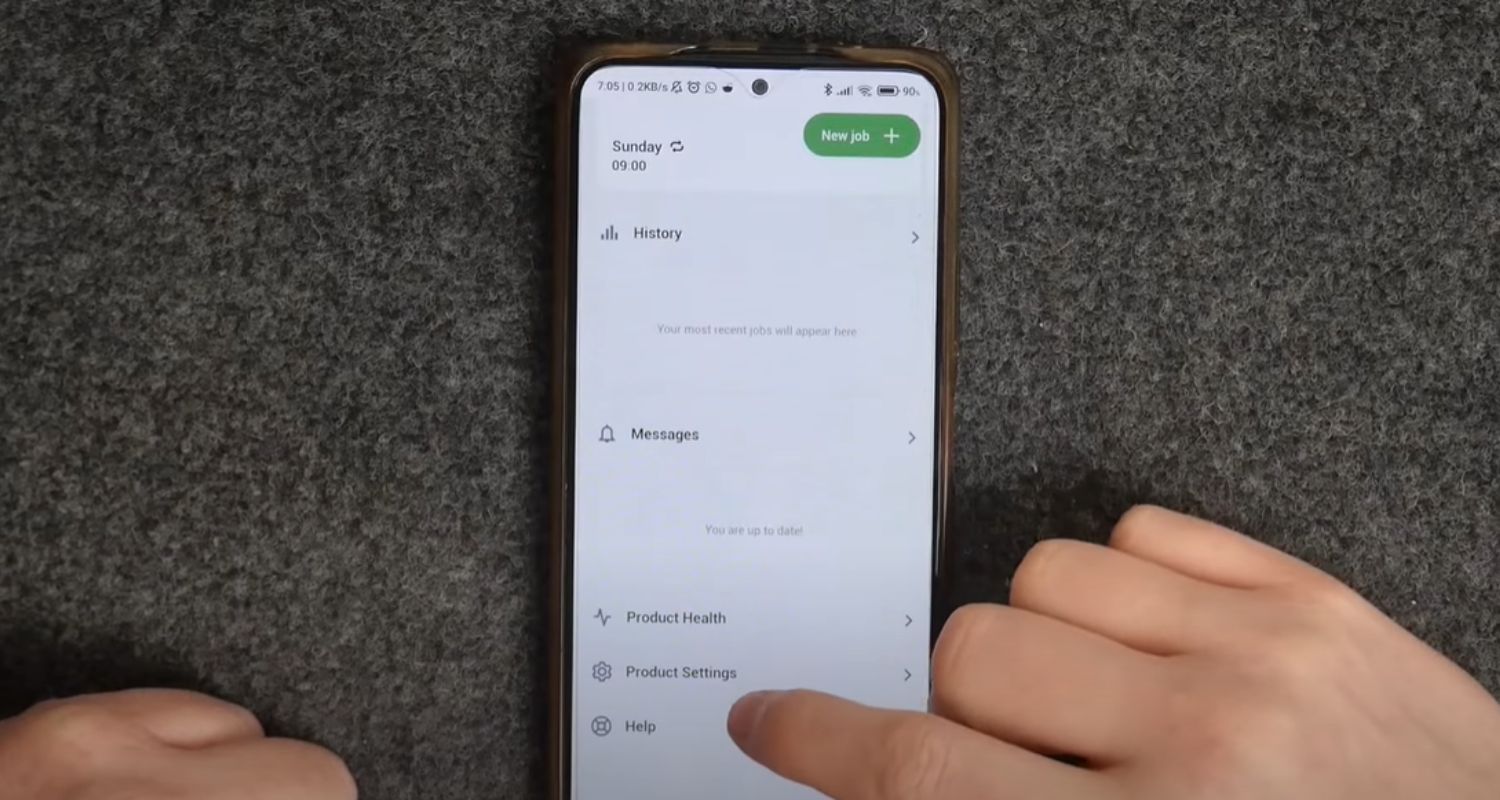
- This pulls up the settings menu. Scroll down the list until you see the “WiFi Connection option.” Tap that sucker.
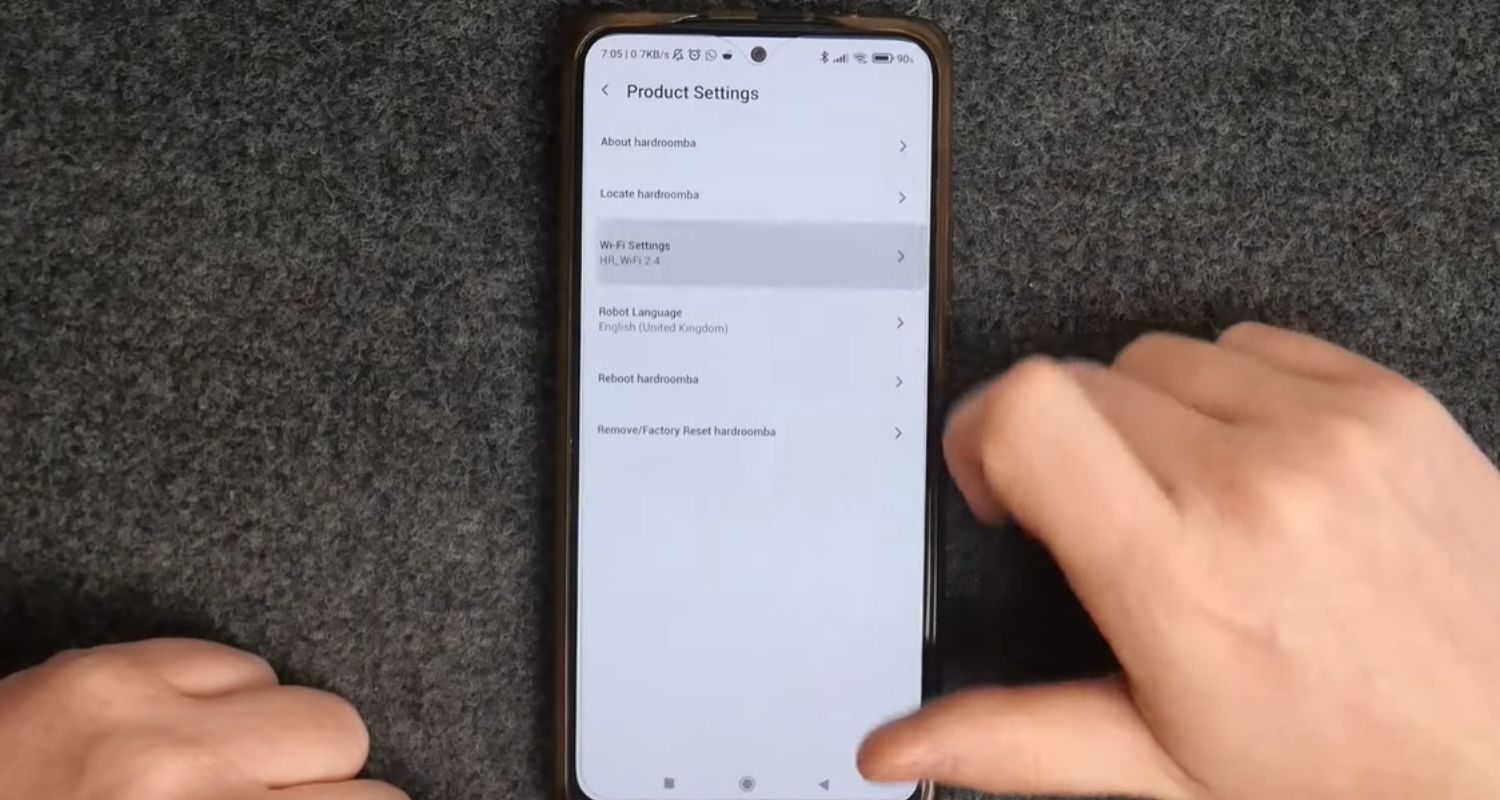
- Now it’s time to get your hands dirty. The app will give you all the details, like your Roomba’s network name and password. If you need to change anything, modify the info here.
- When you’re done editing, hit the “Save” or “Apply” button, depending on your device.

- Your Roomba will automatically disconnect from the old network and sync to the new one. The entire process usually takes just a few minutes. So that is how to set up Roomba.
And that’s it! Your trusty Roomba worker is now happily vacuuming on the latest WiFi. Piece of cake, right? Don’t hesitate to tap those settings whenever your connection needs freshening up. Keeping things optimized means your bot buddy can keep your floors fresh as a daisy. Additionally, we have a guide on Changing WIFI On Feit Electric App for hassle-free control of your home automation devices.
See Also: How To Login To Pesi – Simple & Latest Guide For 2024
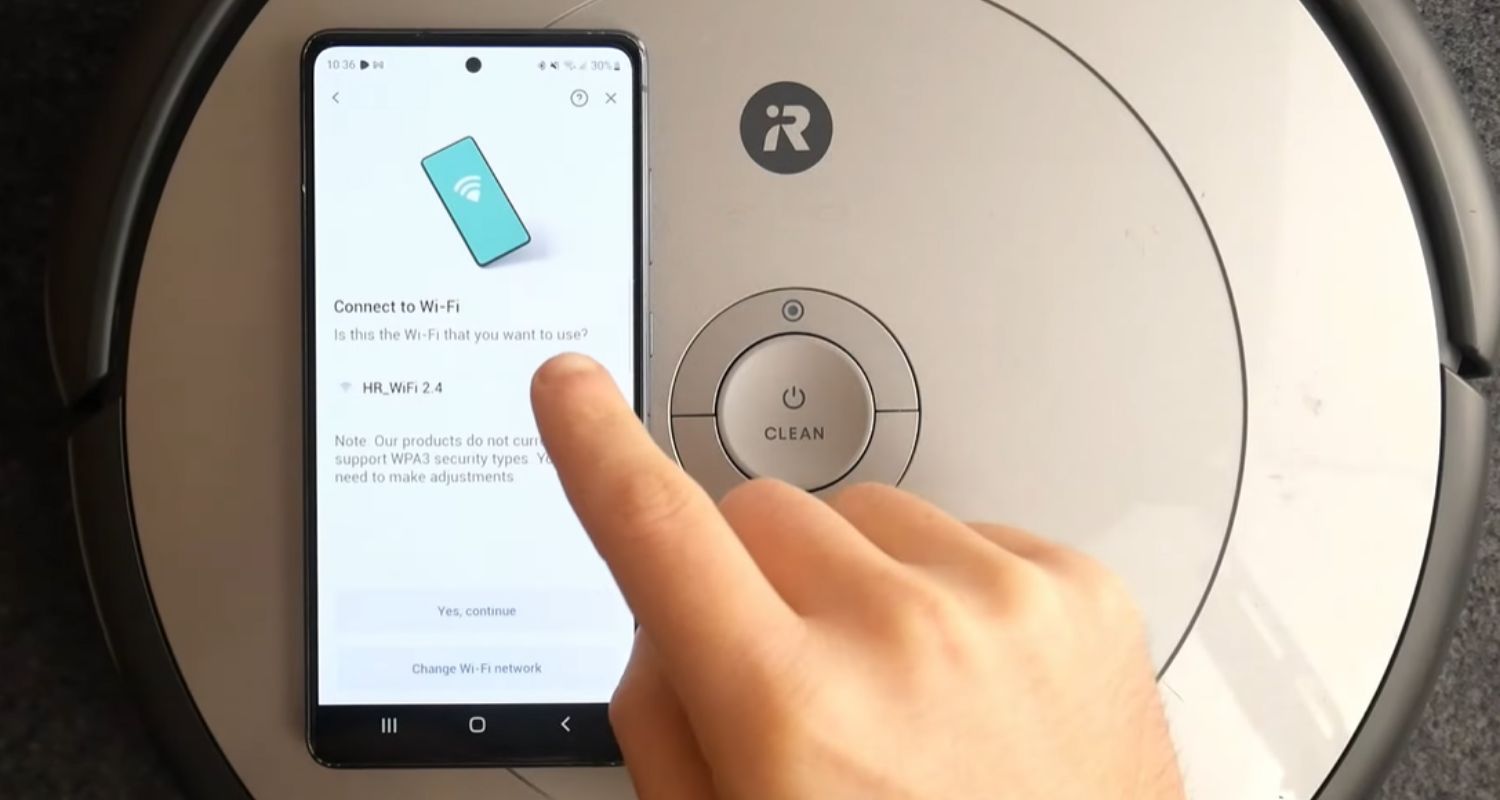
Connecting Roomba to a New WiFi Network
Getting your Roomba connected to your home WiFi is an important first step to control its cleaning features from your phone. While not too tricky, there are a few things to know to ensure a smooth setup.
- The first is ensuring your Roomba is fully charged or plugged in. It needs the power to go through the connection process. Next, you’ll need to know the name and password for your WiFi network. Have these handy before you start linking up.
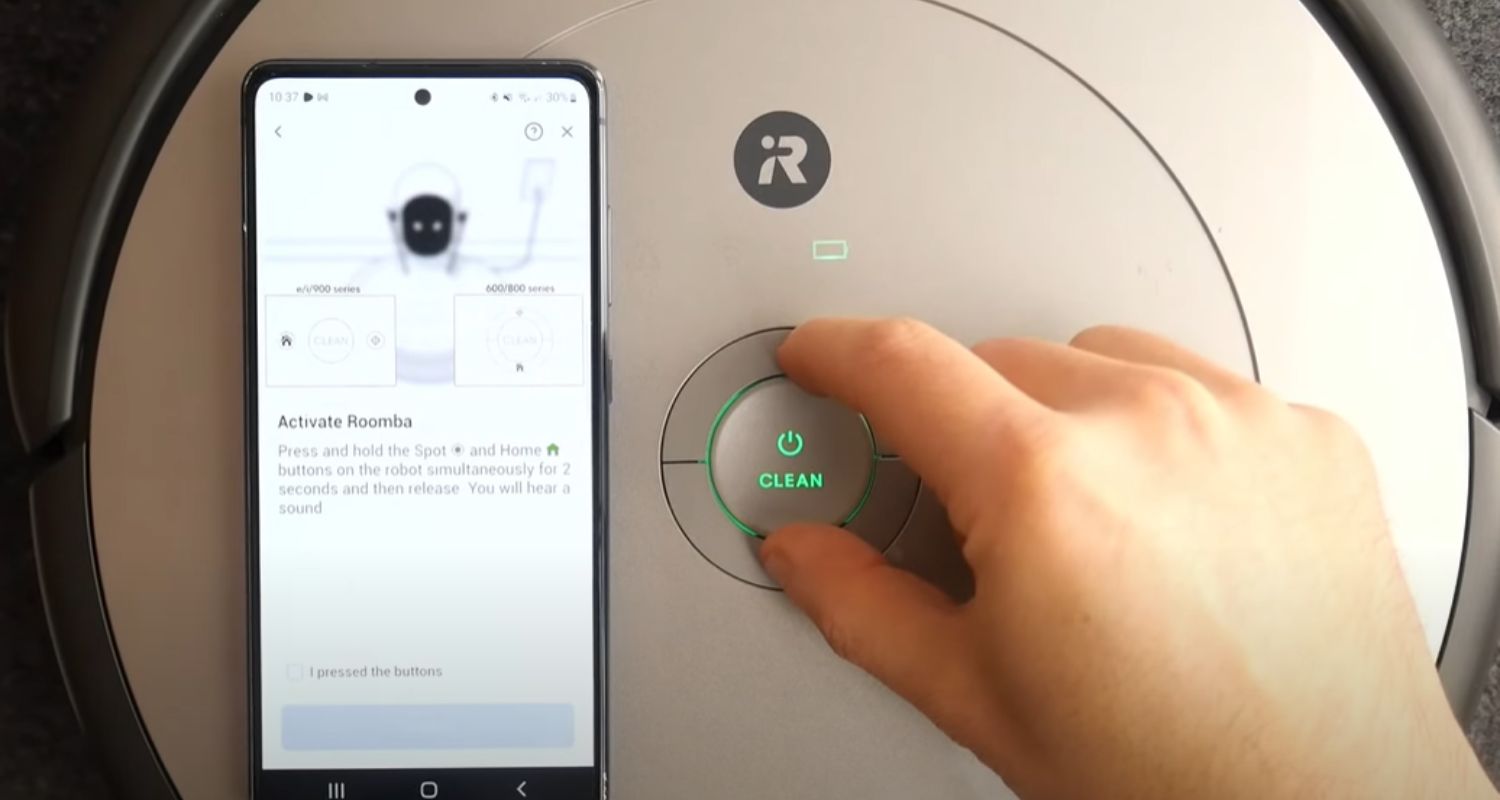
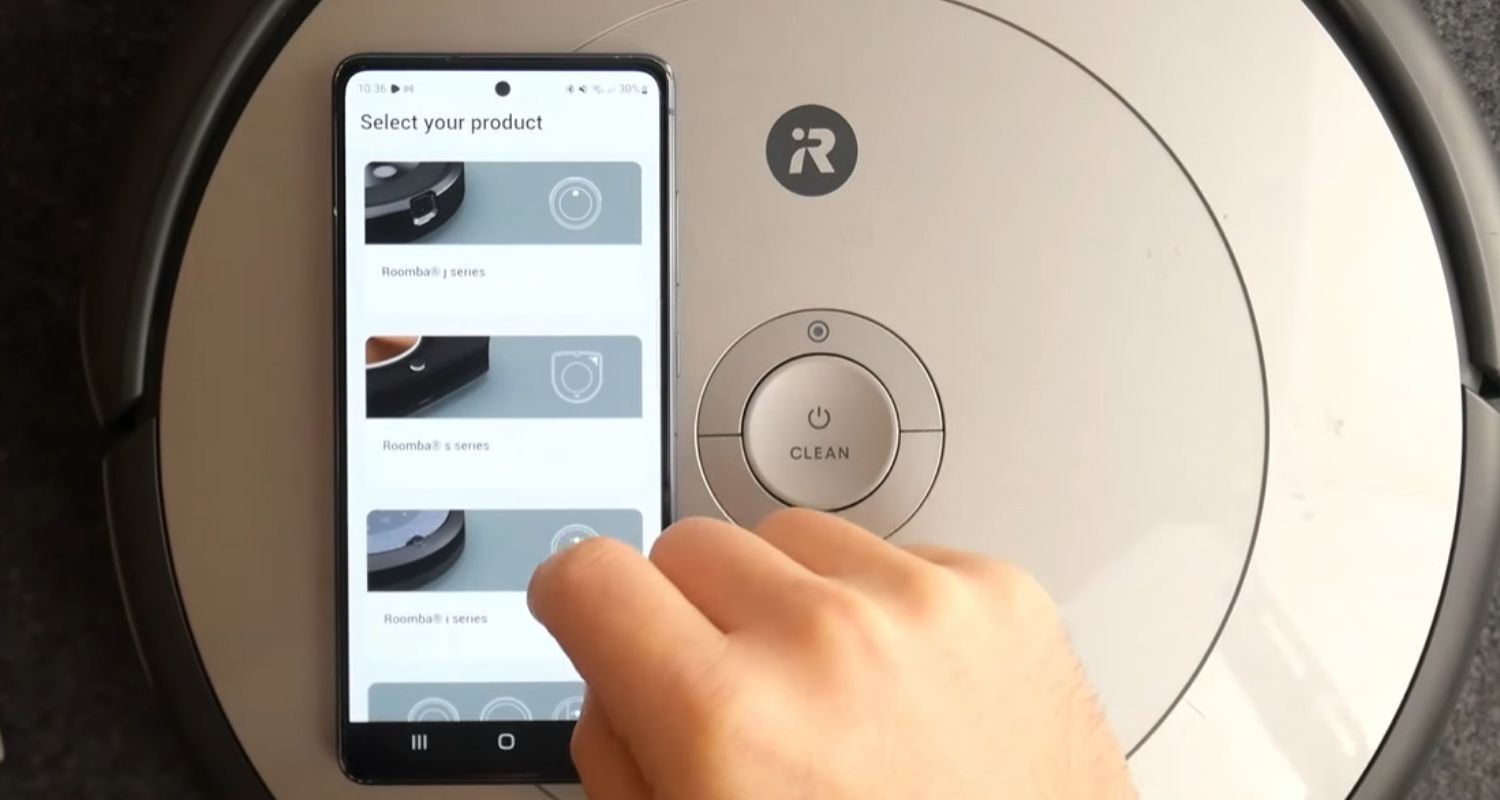
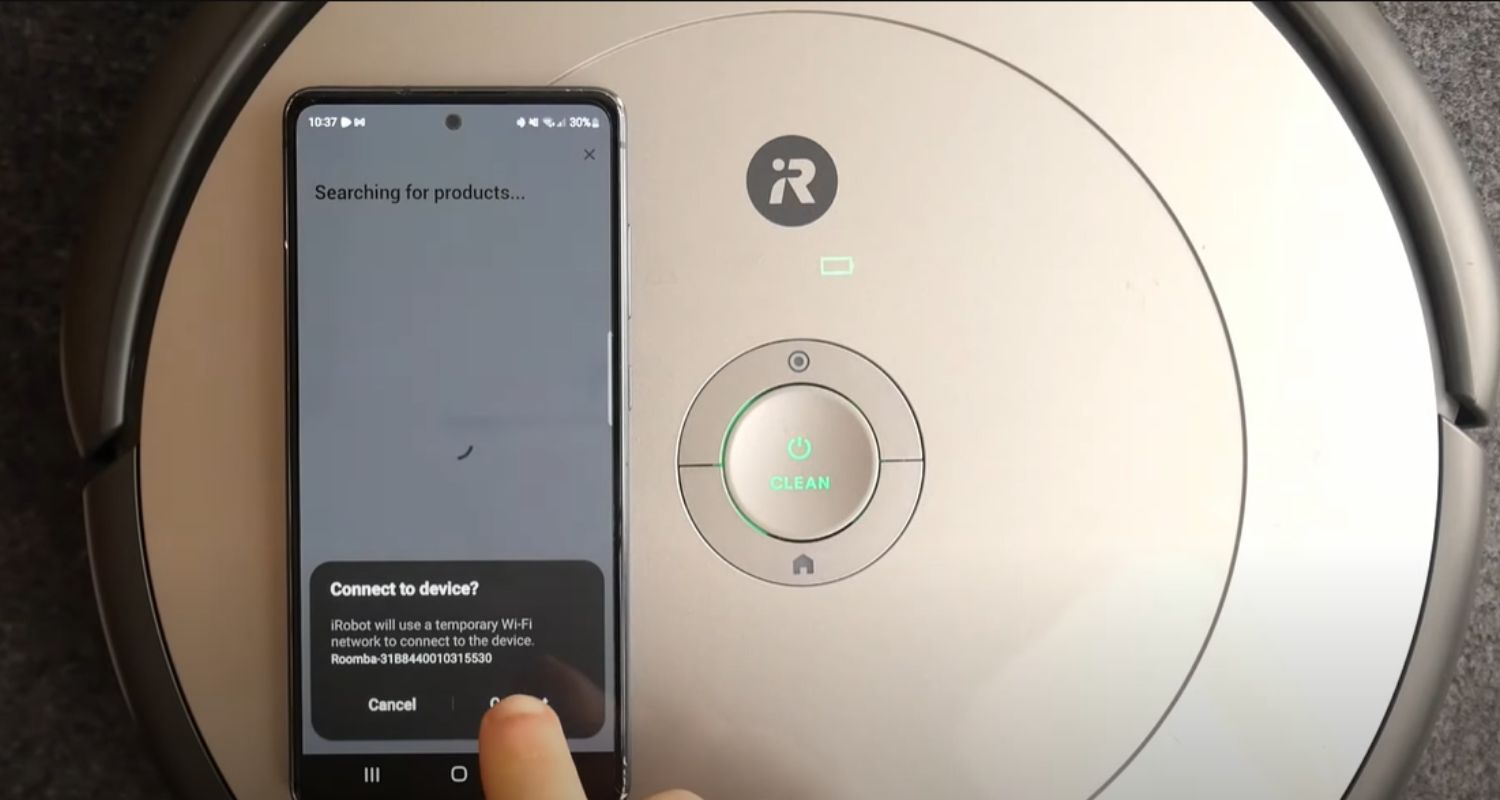
- Power on your Roomba and wait for the WiFi light to start blinking, showing it’s ready to connect. Open the iRobot Home App and select “Add a robot.” Follow the prompts to choose your Roomba model and input your network details. So that is how to connect iRobot to WiFi.
- At this stage, having the Roomba near your router is helpful for a strong signal. The closer, the better to start. Establishing a link may take a few minutes as the robot verifies the info.
- If the connection fails after multiple tries, don’t fret. Move the Roomba a tad closer to the router and retry. Metal objects and thick walls can interfere with the signal over longer distances.
- Once pairing is complete, give your new robotic pal a fun WiFi name like “DirtDevil” or “Floorgician” in the app. Now, it’s discoverable even when out of sight, letting you start/stop cleaning with a tap.
- Be sure to return the Roomba to its regular cleaning areas after setup. Over time, as it maps your space, you can use the app’s room features to designate specific cleaning zones, too. So that is how to connect Roomba to WiFi.
With a little patience during wireless syncing, your Roomba will be vacuuming autonomously in no time. Just be near the router first, and you’ll be sweeping sans effort quickly!
Don’t forget to check out this guide to Connect WiFi Extender To Router Without WPS!
Troubleshooting Common Roomba WiFi Connection Issues
Now that you know how to change roomba wifi, what If your little robotic cleaner isn’t connecting to WiFi like it should? Don’t stress – many Roomba owners face similar hiccups. The good news is there are usually simple solutions to get your home tied together again.
One common culprit is a weak signal between the Roomba and your router. Move the bot as close as possible to help it grab those wireless waves. If still no luck, there could be interference from thick walls or other electrical devices nearby. Relocate the router higher or to another part of the home.
Another thing to double-check is that you entered your WiFi password correctly during setup. Typos are easy to make – trip back into the app and verify the characters match up to what’s on your router. If the connection was previously successful, this is less likely, but doesn’t hurt to be certain.
Updating your router’s firmware could also help strengthen its communication abilities. Log into the admin page to install any patches or updates available. A revitalized router means better performance for all smart devices.
As a last resort, when the password and placement look right, perform a factory reset on your Roomba. This clears any corrupted settings, clogging the connection process. After resetting, carefully redo the WiFi linking from scratch.
No matter the cause, remain near the robot with your phone while troubleshooting. Seeing the status in real-time helps pinpoint where things may fall apart. You’ll have your digital cleaner back in action in no vacuum!
See Also: How To Block Internet Access | Block Someone Using Your WiFi!
Adjusting Roomba’s WiFi Settings for Optimal Performance
Did you know you have some control over your Roomba’s WiFi habits to maximize its potential? While the initial setup is hands-off, diving into the robot’s settings allows for tweaks that can help it easily zip around your house.
Assigning your Roomba a static IP address on your network is one simple upgrade. This keeps it consistently found at the same digital location instead of being assigned addresses randomly. Navigate to your router’s landing page and reserve an IP for your cleaning companion.
You can also check your robot’s signal strength through the app and position it accordingly. Five bars are ideal – anything less may cut communication during cleaning sessions. Move your Roomba a bit closer to the router if needed. 
Some routers allow bandwidth controls where you can throttle internet speeds dedicated to each device. Reserve enough for your Roomba to seamlessly receive cleaning/mapping instructions from the cloud without delays.
Ensuring your network’s wireless channel isn’t overly congested optimizes connectivity. Some routers let you switch between available frequencies for smoother automated use.
Tweaking settings unlock your Roomba’s potential to excel at dusty duties. With priorities like static addressing, signal power, and airwaves in shipshape – it’ll be flicking dirt with lightning efficiency! A content and connected robot is truly a clean home’s best friend.
Now let’s see how to change Roomba wifi sync when you have multiple Roombas!
See Also: How To Factory Reset Nighthawk Router: A Step-By-Step Guide
Syncing Multiple Roombas to the Same WiFi Network
If you’ve got multiple robotic helpers vacuuming around the house, connecting them all to one WiFi network can be handy for orchestrating cleaning chaos.
Syncing various Roombas together digitally gives you benefits like scheduling simultaneous sessions across floors and viewing each bot’s status from anywhere.
- To sync multiple machines to your network, start by fully charging one Roomba and going through the standard WiFi setup process. Then repeat with the next robot – during configuration, choose the same WiFi network and password as the first.
- The iRobot Home App automatically identifies all Roombas paired to your network. Give each one a unique name like “UpstairsBuddy” or “KitchenKrusher” to easily tell them apart virtually. You’ll see all connected vacuums displayed together in the app.
- Now, you can deploy legions of lint-lappers simultaneously from the tap of a button. Tap “Clean All” to immediately dispatch the whole gang on dusting duty. The app makes combining forces for an all-out attack on dirt effortless.
Syncing additionally allows remotely checking each Roomba’s cleaning history, battery life, and maintenance reminders in one place – no more hunting robots from room to room. The days of uncoordinated vacuuming are over with a fluidly functioning network of nano-cleaners.
So gather up your floor-faring fleet and team them together digitally! A legion of linked lint-lappers means your home stays spick and span with fewer manual efforts.
See Also: How To Factory Reset Sonos Amp Router
Tips for Maintaining a Strong and Secure Roomba WiFi Connection
Once your robotic vacuum cleaners are synced to your home’s WiFi, keeping some best practices in mind to preserve a stable connection when connecting Roomba to WiFi is good.
- Regularly update your router’s firmware to keep it running at top functionality. Manufacturers frequently roll out security patches that boost performance.
- Consider using a personalized key to encrypt your network’s traffic. This creates a virtual barrier protecting data traveling between devices. Consult your router manual for setup steps.
- Similarly, avoid default or easily guessable passwords. Opt for long, random character strings that would be nearly impossible for outsiders to decrypt.
- Place any smart home devices, like Roombas, on a separate network segment from private devices whenever possible. This isolates them in case of remote security risks.
- For periodic deep cleans, fully power cycle your router by unplugging it overnight. This refreshes internal components and clears any residual technical gunk collecting inside over time.
- Keeping systems optimized prevents lags, delays, and other issues that could interrupt Roomba’s jobs.
Happy, healthy home networks mean blissfully automated vacuuming with no manual mess! So that’s all about how to change Roomba WiFi.
FAQs
Can I connect multiple Roombas to the same WiFi?
Syncing them allows simultaneous and remote control through the app. Follow the standard setup for each robot, selecting the same network during configuration.
How far away can my Roomba be from the router?
Ranges can vary, but within 30-50 feet generally works best to maintain a strong, reliable signal. Metal obstructions and thick walls can weaken connectivity over longer distances.
Can I change my WiFi password after setup?
To keep it connected, update the password in your Roomba’s settings. Locate your robot in the app and select 'WiFi' to input the new network credentials.
What if I move my Roomba to a new home?
No problem; follow the standard setup steps to connect it to your new location’s WiFi network. Make sure to charge the battery fully beforehand.
Conclusion
This guide on how to change Roomba WiFi covered the ins and outs of WiFi integration for hardworking robot vacuums.
Applying these tips, from basic pairing procedures to maintenance best practices, ensures your cleaning companions zip around hassle-free. Remember to optimize signal strength and network controls for peak performance, too.
Keeping connections configured correctly means spotless floors on autopilot. Don’t hesitate to reach out if linking robot helpers to WiFi ever feels overwhelming – consider these posts your handy roadmap to success!
Hello people. I have started this website for all of you who have troubles while logging in into their router. I personally have faced a lot of issues and that is the sole motivation for starting this. Hope it helps you guys. Cheers!
